How to Implement Batch Processing in Flows
- D. Dewangan
- Nov 25, 2024
- 4 min read

Ready to transform your business workflows? With Salesforce Batch Management, you can handle large data sets effortlessly! Join me as I walk through creating batch jobs to send weekly case closure notifications and clean up records—all without writing code. From setup to monitoring and managing batch jobs, this guide makes it easy. Let’s explore how to streamline your workflows together and achieve more with fewer clicks!
With Batch Apex, handling large data sets or extended tasks in Salesforce is simplified. This post covers setting up Batch Implementation, structure, best practices, and real-world examples. Batch Management requires no code—just a few clicks in the UI. It allows you to run and monitor multiple batch jobs within a scheduled flow.

Note: Feature is only available in the developer org not in the scratch or sandbox org
In our scenario, we will send case close notifications for each closed case this week and clean up the closed cases. We would notify the ERM team for each case being closed.

We will approach this whole solution with flows and learn about batch implementation through Salesforce Batch Management.
Here are the steps to achieve the functionality:
Create a custom label.
Create an email template.
Create an auto-launched flow(no trigger).
Create a batch job using Batch Management.
Create a scheduled flow.
Let's start:
Step 1. Create 2 custom labels.
Recipient Address: ERM Email: erm@avenoir.ai
Sender address: No-reply Email: no-reply@avenoir.ai
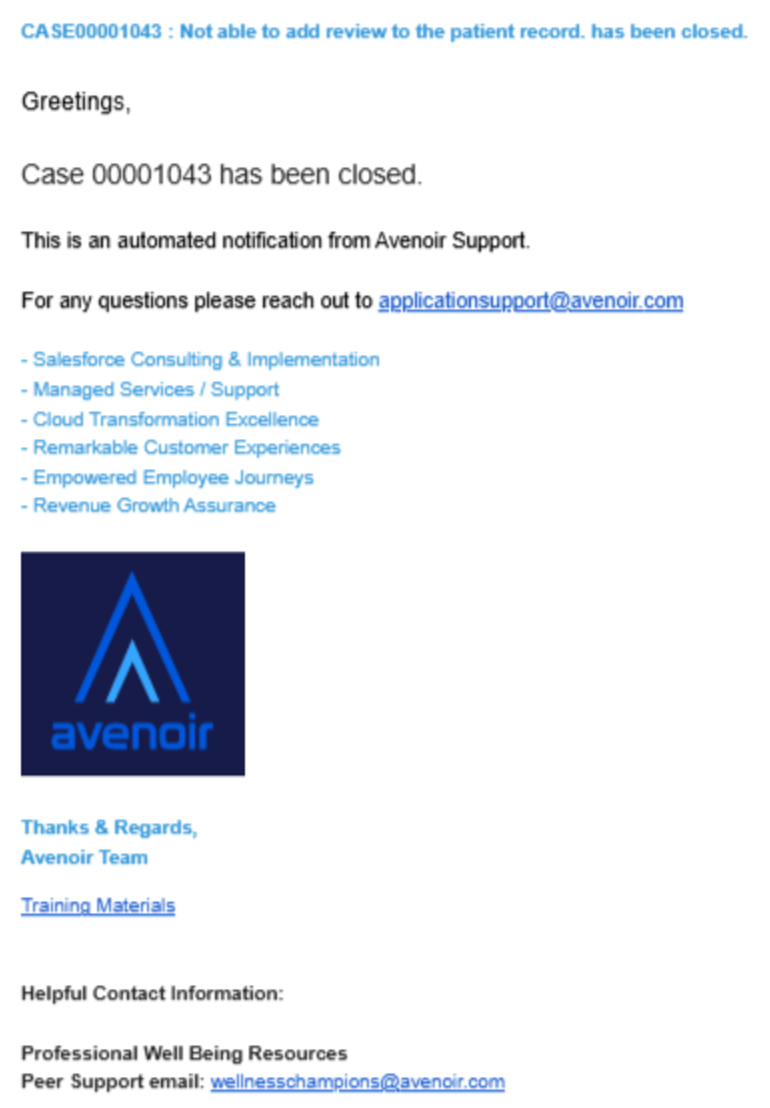
Step 2. Create an email template.
Name: Case Closed Notification
Developer Name: Case_Close_Notification
Related Entity Type: Case.
Select Folder: Choose the folder location you want to save the template in.
Subject and HTML Value: Set the subject and HTML value as per your need.
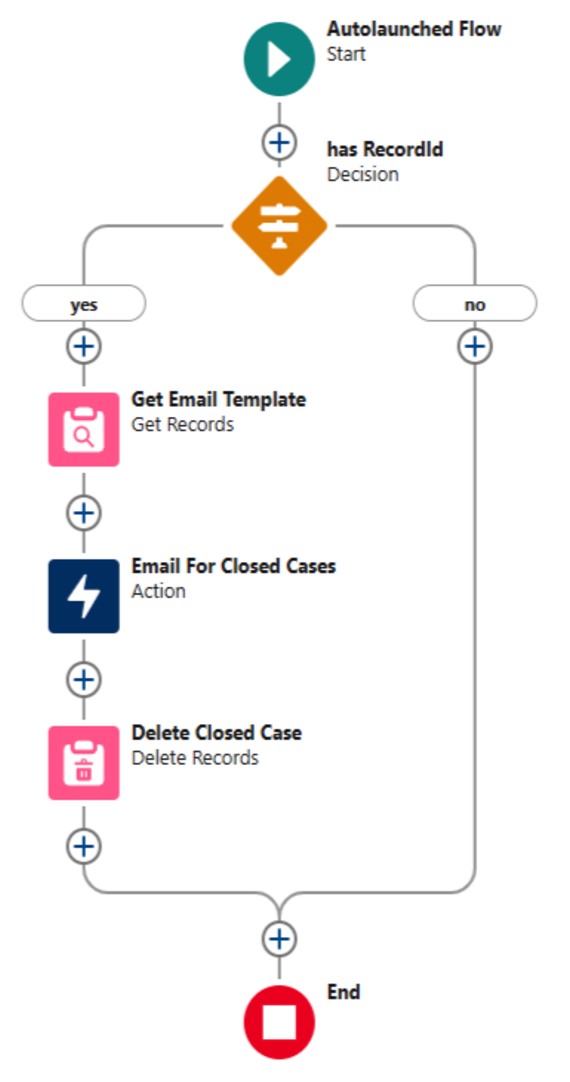
Step 3. Create an auto-launched flow(no trigger).

Name: Closed Cases Notification And Cleanup.
Create a variable: recordId (Text and available for input)
Add Decision element: has RecordId
Yes : recordId isNull False
Default Outcome: No
Add Get Records :
Object: Email Template
Filter Criteria: Developer Name Equals Case_Close_Notification
Add an Email Action :
Label: Email for closed Cases
Api Name: Email_for_closed_Cases
Email Template ID: get records> Email Template ID
Recipient Address List: custom label: ERM Email
Recipient ID: contactId (Any contact with a valid email address)
Related Record ID: recordId
Sender Email Address: customlabel: No-reply Email
Add Delete Records :
Specify conditions:
Object: Case
Filter Criteria: Id Equals recordId
Save and activate the flow.
Step 4. Create a batch job using Batch Management.
Go to Setup > Home > Quick Find > Batch Management.
Click on the New button.
Fill in the Details Section :
Name: Case Closed Notifications
Api Name: Case_Closed_Notifications
Process Type: Flow
Execution Process: Closed_Cases_Notification_And_Cleanup
Group: Support
Batch Size: 10 (as we need to send an email for each closed case)
Retry Count : 0
Retry Interval: 1000
Flow Input Variable: recordId
Click on the Next button.
Fill in the Object and Criteria section :
Object: Case
Criteria: Closed Equals Value True
Hit the Save button.
Activate the batch job.
Step 5. Create a scheduled flow.

Name: Send Email For Closed Cases
Api Name: Send_Email_For_Closed_Cases
Start Date: Today
Start Time: 10:00 AM
Frequency: Weekly
Add Action Element :
Name: Process Closed Cases
API Name: Process_Closed_Cases
Add: Case_Closed_Notifications
(Batch job created in above step)
Activate the flow.
Now as all things are in place, the ERM team would be notified for cases closed weekly.
Let us now learn more about the batch implementation:
Monitoring of batch jobs
Go to Setup > Monitor Workflow Services.
View all batch job instances in the list.
Select the batch job instance to view Details and Parameters.
View the Tasks tab for details on batch job parts.
View the Failed Records tab for records the batch job couldn’t process.

Submit Failed Records
If you choose to submit specific failed records for processing, you can select up to 200 failed records. After you resubmit the failed records, their status changes from Failed to Resubmitted. To process the failed records, a new batch job is created and run automatically.
To submit all, click Submit Failed Records.
To submit specific records, select them on the Failed Records tab and click Submit.
A new batch job is automatically created to process resubmitted records.
Note: If records fail again, resubmit them through the new batch job.
Processing Of Failed Records
When a batch job processes records, only the successfully updated records are saved, while any changes attempted on failed records are undone. This prevents partial updates from occurring in cases where some records succeed and others fail. If all records in a batch are processed without issues, the batch is marked as "completed."Cancel a Batch Job Run
When you cancel a batch job, only unstarted parts are canceled; completed parts remain unchanged. After cancellation, you can view completed parts but not the canceled ones.
Delete a Batch Job Run
In Monitor Workflow Services, locate the batch job of type Flow.
Click Delete next to the batch job and confirm deletion.
Batch Management Limits
You can’t do the following with Batch Management.
Select Salesforce Shield encrypted fields in the filter criteria of a batch job.
Create multiple versions of a batch job.
View the details of the successfully processed records.
Run more than five batch jobs simultaneously.
Rerun a batch job after it’s complete.
Feature Availability Org Listing Available in Enterprise, and Unlimited Editions with Loyalty Management, Manufacturing Cloud, Rebate Management, or Accounting Subledger. Access to any industry product also gives you access to Batch Management.
Conclusion
In Monitor Workflow Service, you can cancel a batch job run that’s in progress or resubmit the failed records that a completed batch job run failed to process with easy point-and-click tools up to 3 times. The time interval after which a failed batch job part can be anywhere from 1,000 milliseconds to 10,000 milliseconds.
References
https://www.avenoir.ai/post/how-to-use-more-than-one-sobject-using-iterable-sobject
https://www.avenoir.ai/post/making-rest-api-callouts-using-the-lwc-component
https://help.salesforce.com/s/articleView?id=ind.concept_batch_management.htm&type=5
https://help.salesforce.com/s/articleView?id=ind.concept_batch_management_limits.htm&type=5
https://help.salesforce.com/s/articleView?id=ind.task_monitor_batches.htm&type=5
Blog Credit:
D. Dewangan
Salesforce Developer
Avenoir Technologies Pvt. Ltd.
Reach us: team@avenoir.ai


Comentários